Once a cab vendor successfully completes the registration process, their details are reviewed and verified by our operations team to ensure compliance with quality and safety standards. This includes validating documentation, vehicle fitness, driver credentials, and background checks.
Upon successful verification, the vendor is moved to the Onboarding stage, where they receive training and guidance on our platform policies, service expectations, pricing structure, and usage of the driver/vendor on our website.
The goal is to ensure each vendor is fully prepared and aligned with our service standards before they begin accepting bookings.
✅ Onboarding Process
Once the vendor registration is approved, the Onboarding Process begins to ensure a smooth and professional partnership.
Step 1: Portal Login
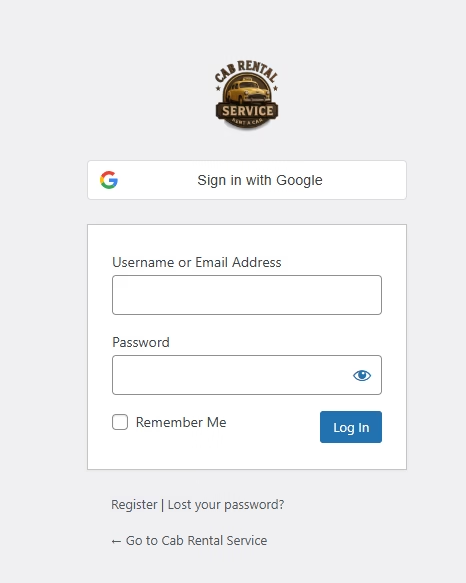
We provide the vendor with a Login ID and Password to access our dedicated Vendor Portal. This secure portal is the central hub for managing bookings, updating vehicle details, tracking payments, and monitoring performance. Click here Login
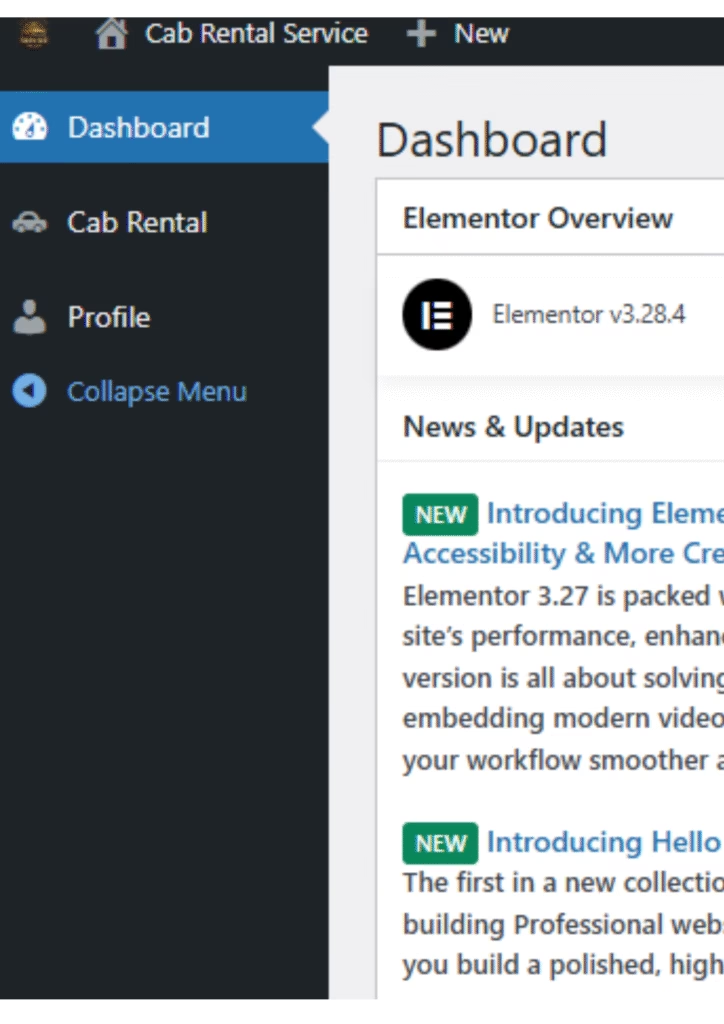
Step 2: Dashboard Access
After logging in, the Dashboard opens automatically. This is your control center where you can:
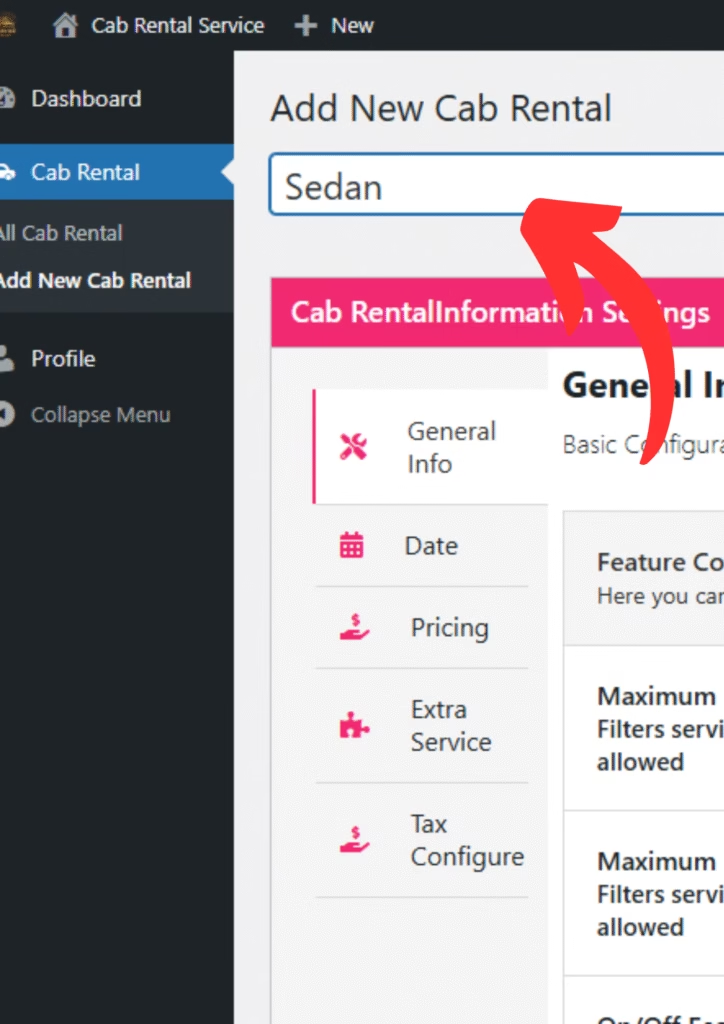
Step 3: Click on “Cab Rental” and Add New Cab Rental
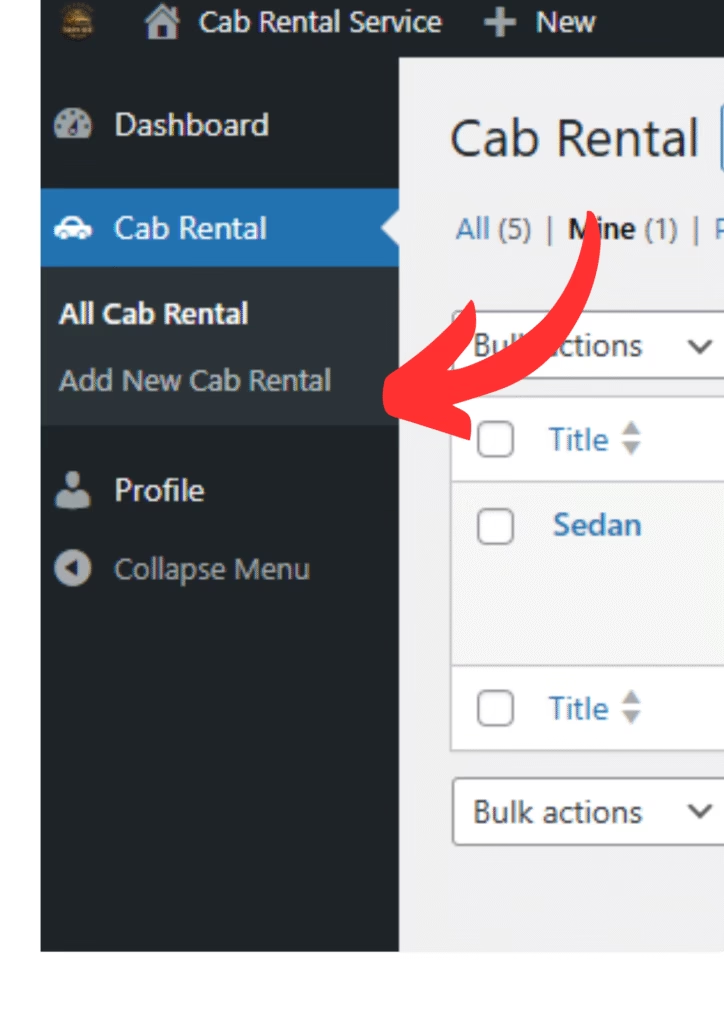
Once you’re on the dashboard:
Driver details and availability
Navigate to the “Cab Rental” section in the main menu.
Click on “Add New Cab Rental”.
Fill in the required details such as:
Vehicle type (Sedan, SUV, etc.)
Fare details (per km/hour)
Vehicle registration number
Step 4: Add Label as Cab Category
Scroll down to the “Label” or “Cab Category” section
Choose the appropriate Cab Category such as:
- Sedan
- SUV
- Hatchback
- Luxury
Step 5: Scroll Down and Add Cab Features
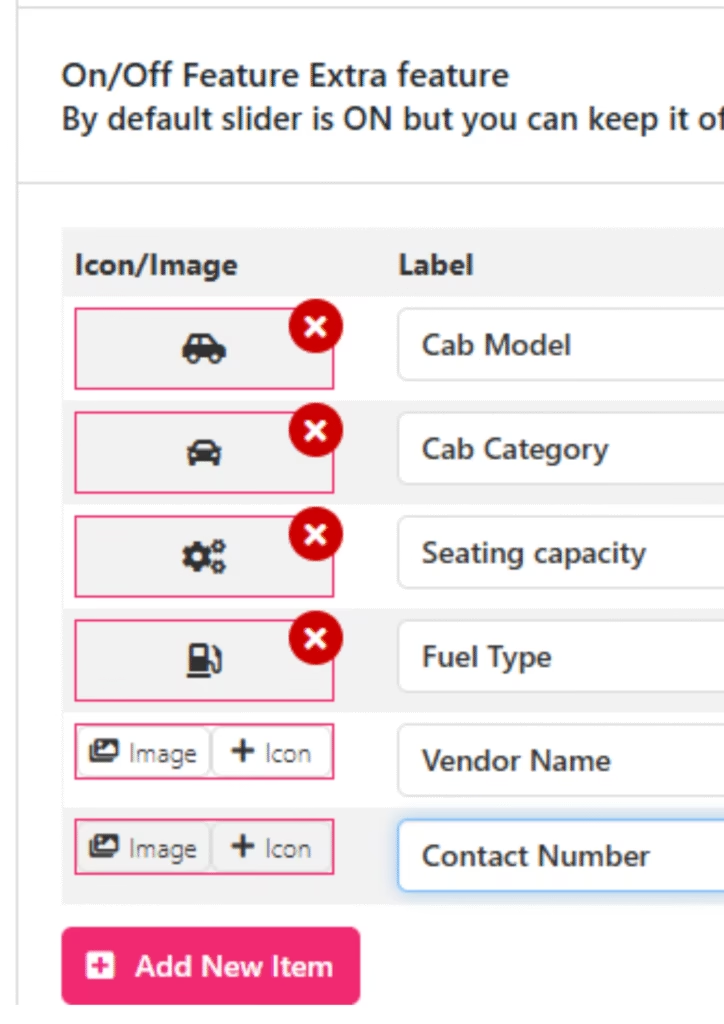
Fill in the detailed cab specifications in the respective fields:
- Cab Model (e.g., Swift Dzire, Innova Crysta)
- Cab Category (confirm again here if needed)
- Seating Capacity (e.g., 4+1, 6+1)
- Fuel Type (e.g., Petrol, Diesel, CNG)
- Vendor Name (Your business or personal name)
- Vendor Mobile Number (used for customer contact and updates)
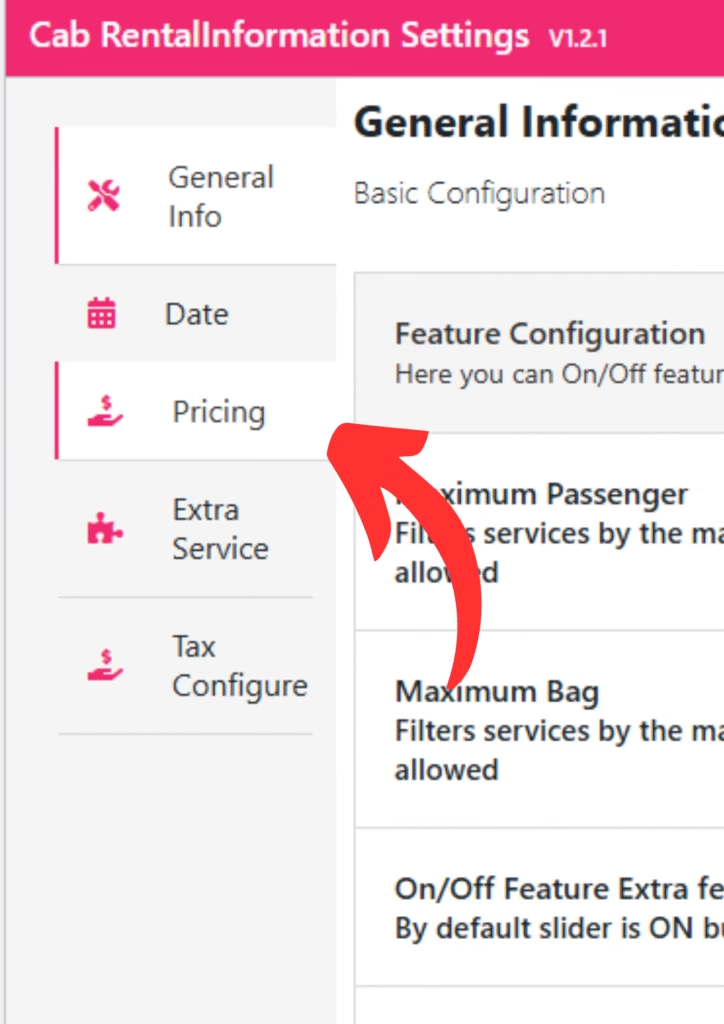
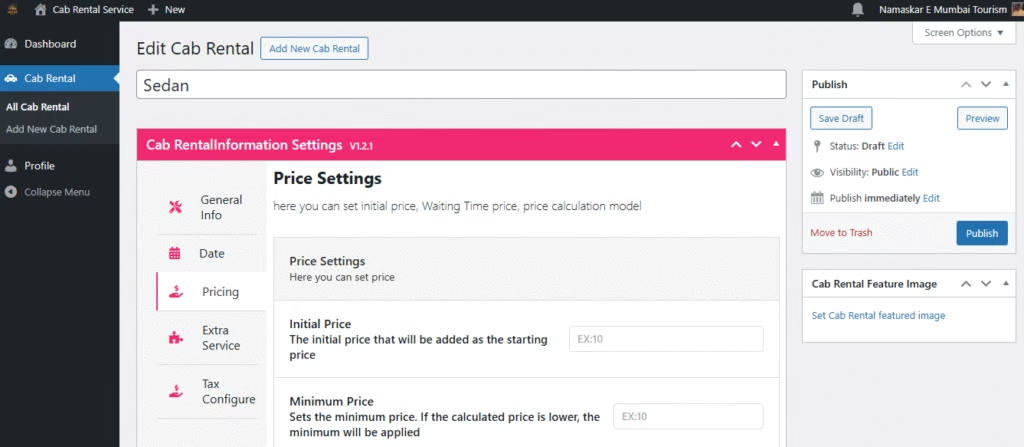
Step 6: Go to “Price” Menu and Add Pricing Details
Scroll or navigate to the “Price” section
Add fare details such as:
- Per Km Rate
- Hourly Rate
- Minimum Fare
- Outstation Fare (if applicable)
- Driver Allowance, Toll, Night Charges (if any)
Step 7: Add New Price – City Pair Fare Setup
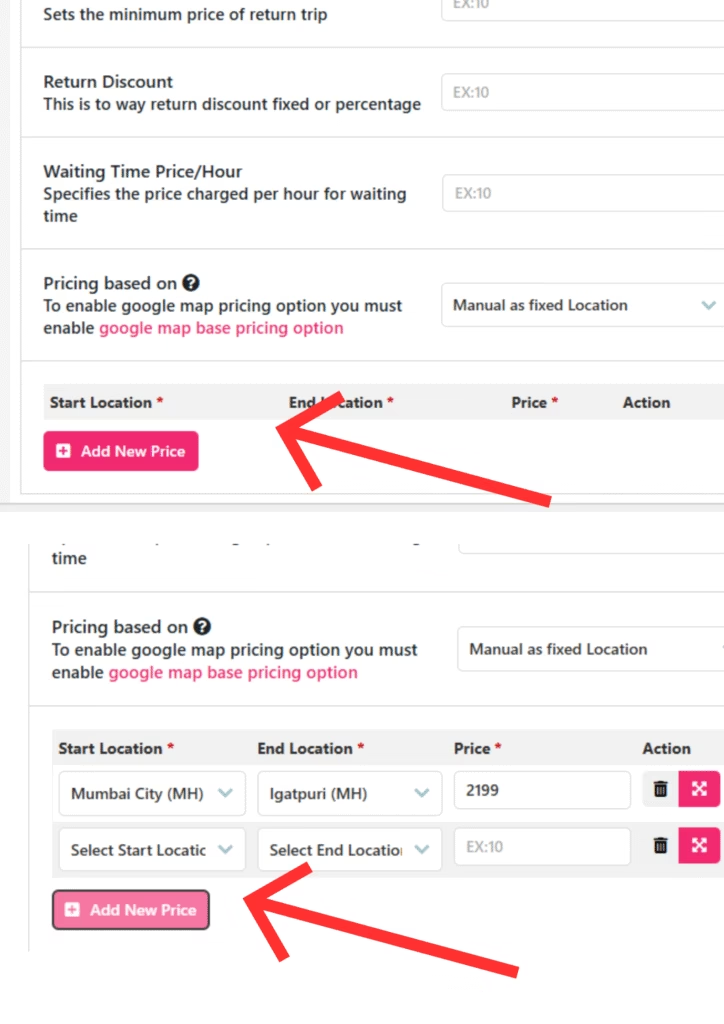
- Click “Add New Price” under the Price section
- Select your Source City (where the cab starts)
- Select the Drop City (destination city)
- Enter the Exact Fare for that route
- add one by one all rout
Step 8: Repeat for Multiple Routes
- Click “Add New Price” again
- Enter another Start Location and End Location (e.g., Mumbai to Nashik)
- Set the Fare for that route
- Repeat this step for every route you serve (e.g., Pune to Lonavala, Mumbai to Shirdi, etc.)
You can add unlimited city-to-city routes with specific fares for each.
Step 9: Publish Your Cab
After filling in all cab details and pricing:
Your cab listing will go live on the platform for customer bookings
Click the “Publish” button on the top right
✅ Congratulations! Your cab is now live on our portal, and you’re ready to receive bookings. Make sure to keep your details up-to-date and fares competitive for better visibility.


Bro go travel